Mobile applications are not easy to quality control. As the system grows in complexity, it becomes increasingly easy to break a portion of the app and overlook this during manual testing sessions. This holds true for both UI elements and the data they present.
I will be focusing on how we do instrumentation testing at NRK TV on Android and AndroidTV. These applications share the same code base, but require different approaches when it comes to instrumented testing due to their different UI.
Instrumentation tests
Instrumentation tests are tests that run on a device or an emulator and have access to instrumentation APIs. This means they have access to all the backend data and the structure of the app, but also know exactly what is displayed on the screen. The tests can thus simulate user interaction with the application, but can also be used as system tests to verify that the application works correctly in its entirety.
Early in the process of looking into how we wanted to test the app, we had a discussion regarding what we actually wanted out of instrumented tests. Simply testing the UI and verifying that the elements exist seemed slightly pointless and overly simplistic. Instead, we wanted our tests to be smart. We wanted them to be able to tell us if we’re showing the right data in the UI, even with dynamic UI elements. We wanted them to tell us whether or not our streams are playing, whether our navigation works and whether interacting with the UI leads to the expected result.
Another point we considered is that we used to have limited health checks for video streams on our mobile applications. Many elements in our app are complex and depend on dynamic backend data. So it is important to continuously monitor that no change of the architecture that we depend on has broken something on our end. For example, if an API suddenly delivers a different buffer length for a live stream, we want to be sure that live TV still plays and behaves as expected.
Lastly, we wanted everyone on the development team to quickly understand the framework and the tests and be able to maintain them. As such, it made sense to choose frameworks that are written in the same programming language and preferably integrate deeply with the app.
We decided that our instrumented tests will verify the following:
- Correct UI elements are present in the UI
- The UI elements present contain correct data
- Interacting with the elements leads to the correct result
What do we mean by correct data? Our applications are dependent on a backend that serves us metadata, streams, pictures and UI colors. We are internally responsible for these systems as well, but ultimately we have to make the cutoff somewhere, so we generally consider the API data “correct” and verify our app according to what the API data says. The assumption being that the respective APIs have their own unit and integration tests that make sure the data they deliver is correct.
For our instrumentation tests we do not mock data, we use whatever exists in production. This is perhaps a controversial decision, but we find that this helps us find many more edge cases. The tests are dynamic enough to handle everything that the back end serves us.
Frameworks
For our TV streaming applications on Android, we use two instrumentation testing frameworks.
Espresso is the first framework we use (https://developer.android.com/training/testing/espresso). It is part of the application, the tests are written directly into the codebase, and it thus has full access to all the resources of the app. This allows Espresso to be much more than a blind UI testing tool. The tests can be dynamic and access the complex functionality of the app itself.
UIAutomator is the second framework we use. This testing framework is primarily targeted at cross-app functional UI testing. It accesses the device directly and can perform actions on it outside of the app itself. Thanks to this, it is possible to use UIAutomator to simulate remote control navigation. This is very useful for testing AndroidTV applications, but can also be useful for web views or system notifications.
We use Kotlin as the main programming language in our Android apps, and thus use it to write our instrumentation tests as well.
An example of an instrumentation test on NRK TV Mobile app using Espresso
Let’s look at one of our Espresso tests. This test validates that our frontpage includes the correct data. Our frontpage is a series of recyclerviews presenting the currently promoted content in tiles we call plugs, arranged in a matrix. The navigation is both top down and from left to right.
Every row of plugs is potentially different. Some plugs have titles, others have promotional text, and some don’t have any text whatsoever. In addition, some plugs are stand-alone tiles that aim to promote a single important show or film, while others are a cluster of 3 tiles, thus complicating our navigation even further.
The Espresso test does the following:
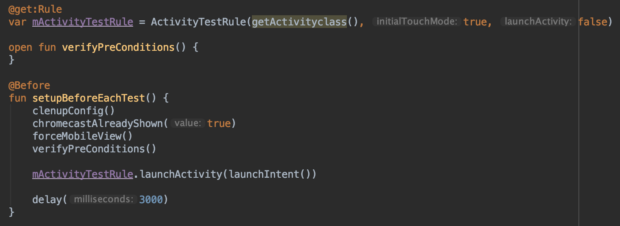
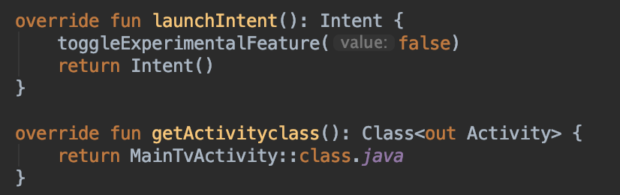
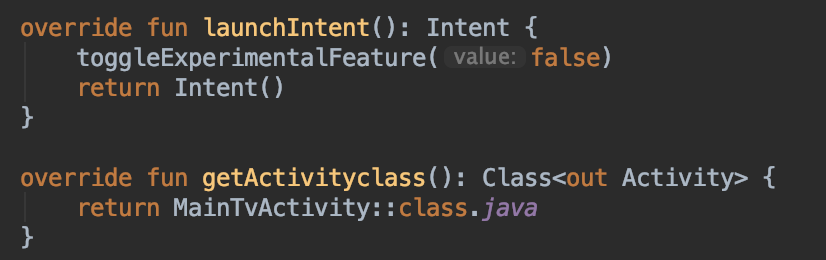
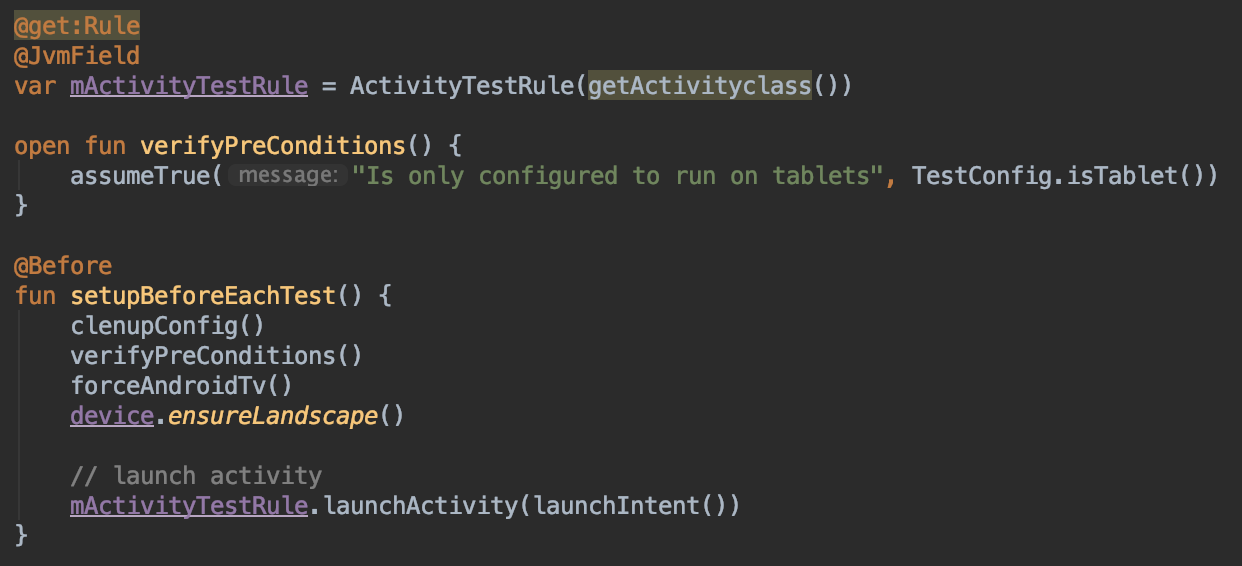
- Toggle the appropriate config flags and launch the app on the correct activity. In this case, we make sure our Chromecast overlay is gone (it prompts a new user to try our Chromecast feature), that our experimental feature is off, and we force the app into Mobile mode (more on that later). We do this in a setupBeforeEachTest function which ensures that these settings are in place before every test we run.
- Make an API call towards our back end which tells us what should be on the frontpage. We use the same code that the app already uses to retrieve and parse this data, so we have the same base context for expected data which we can now verify against. The data also includes information about the different plug types, which allows us to determine what attributes the plugs should have.

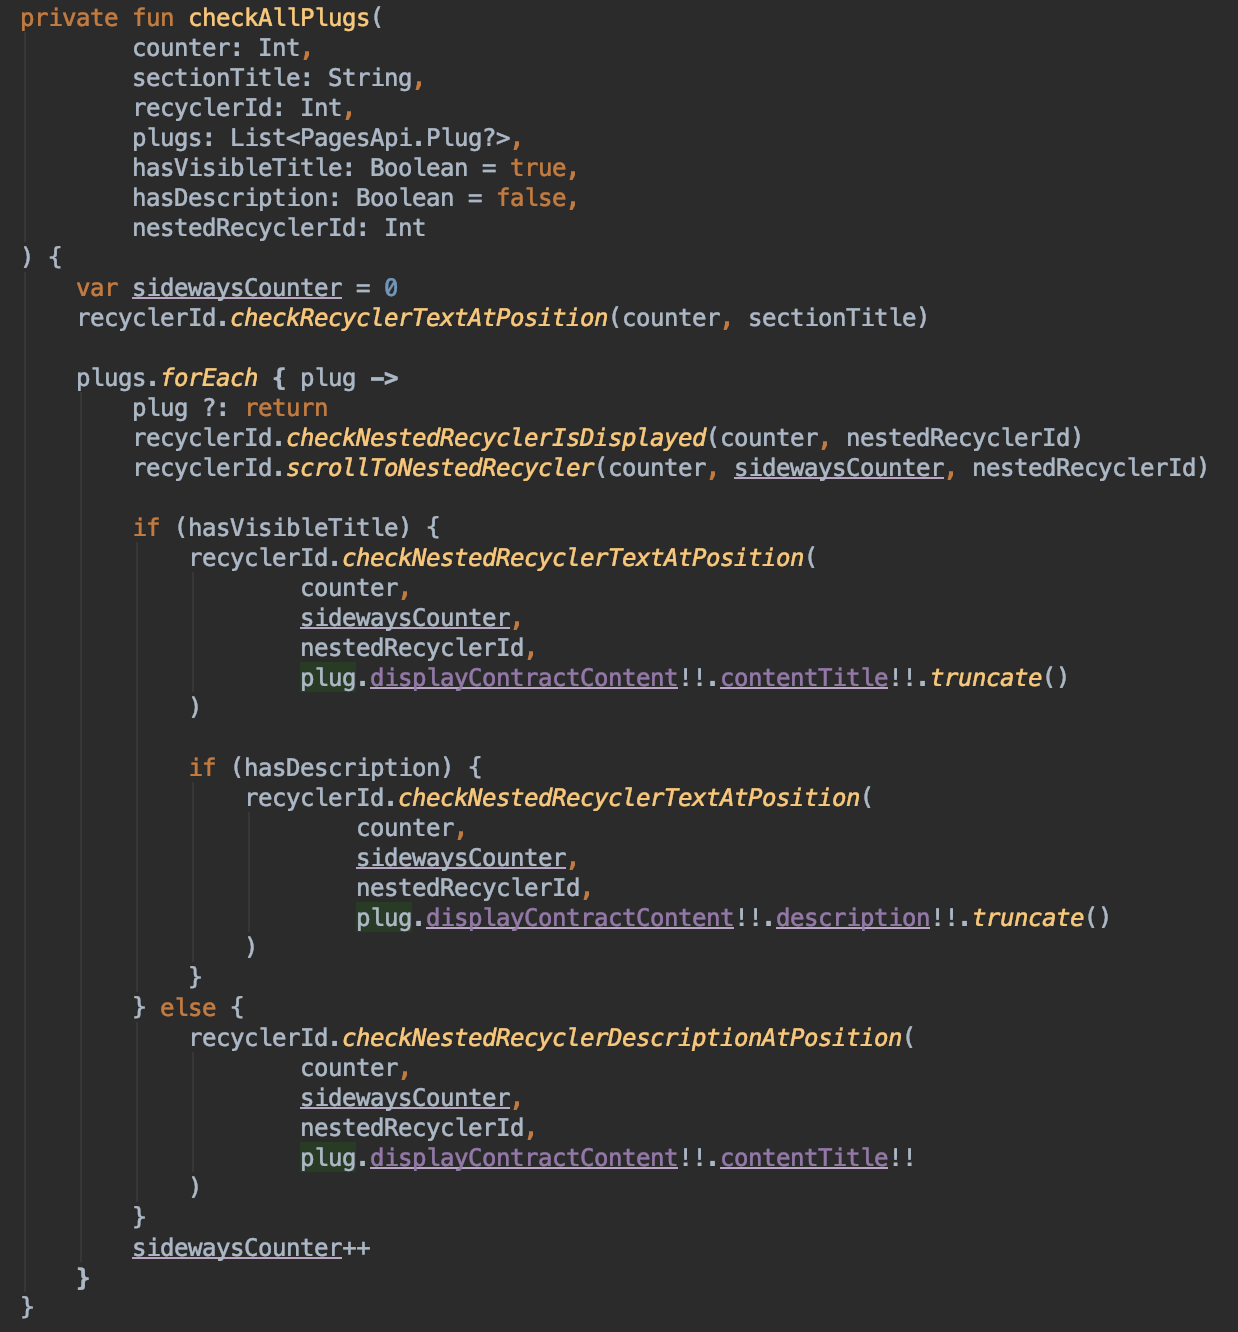
- Now we start iterating through the elements on the frontpage and check that each one has the text it should have. When no text is present, we check the content description to verify that the plug is still correct. If a plug also has a description, we check that as well.
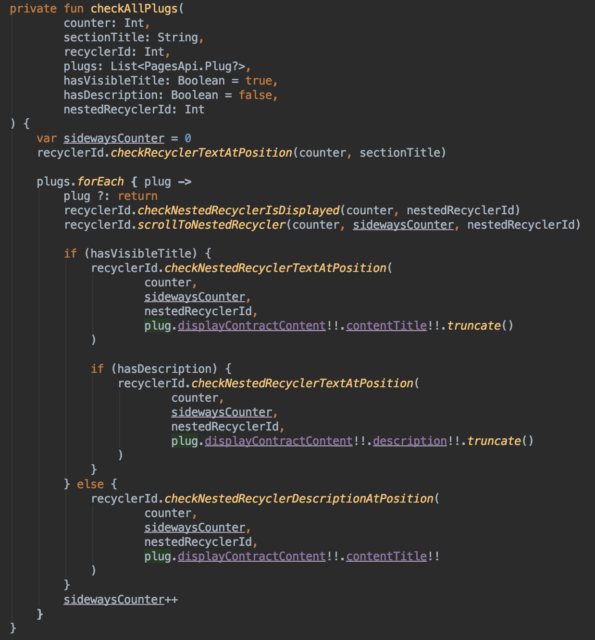
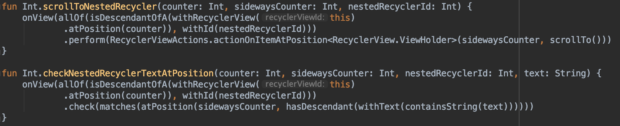
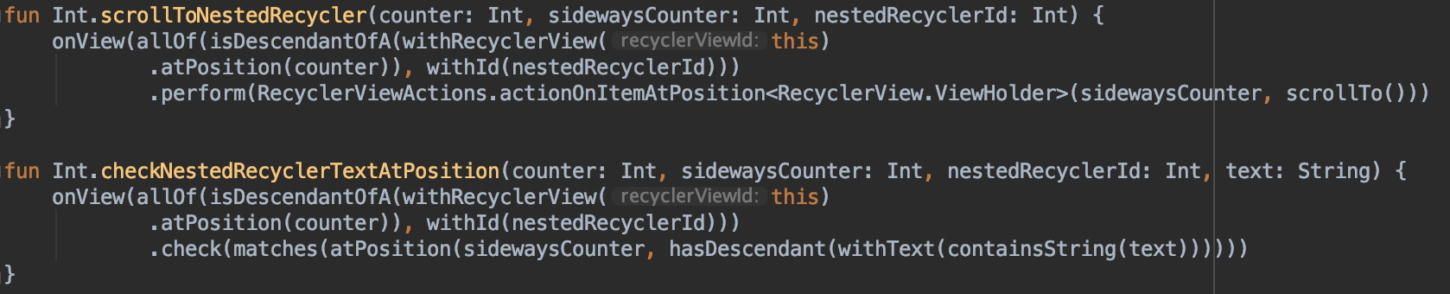
We scroll to each row and then sideways through the recyclerview. We use a custom matcher to achieve this. We hide this behind an abstraction layer as the code gets quite messy when operating with a nested recyclerview within a matrix.
This way we can be sure that when we change anything on the front page, the whole view doesn’t break and the plugs are still displayed properly with all the correct data. The test also works as a specification of what each plug should look like.


And finally, this is what the test looks like when running on the emulator. Note that the recording of the test is not sped up in any way.
An example of an instrumentation test on NRK TV AndroidTv app using UIAutomator and Espresso
Let’s look at a test for our on demand video player. We are not actually able to test that the stream plays directly using this framework, but our workaround is to test that the timestamps change, which has so far been a fairly good indicator.
The test works in the following way:
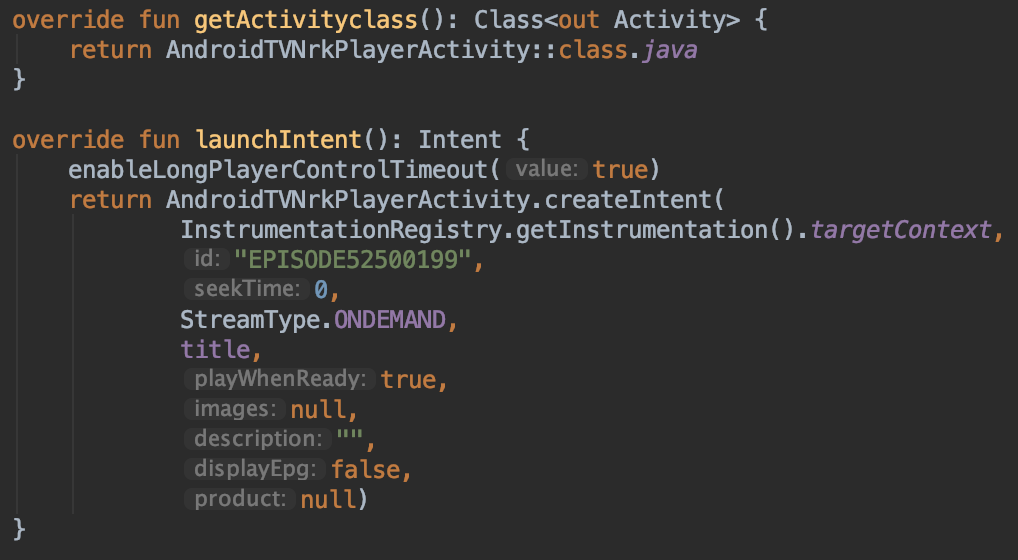
- Toggle the appropriate config flags and launch the app on the correct activity. In this case, we force the app into AndroidTV mode and toggle a config that allows the player controls to stay up for a longer period of time. The activity we launch includes only the player. This way, we can circumvent navigation, which benefits both speed of the test and reduces the amount of potential errors. We are also able to access the intent directly and populate it with all the necessary data, including specifying which stream to play, what timestamp to start it at, etc.
- We let the video play for a few seconds and then pause it using a UIAutomator keycode command which simulates a press on the center button of the remote control. We then use Espresso to retrieve the current timestamp from the UI. We parse the timestamp and check that the video has played for at least as long as we expected, in this case 5 seconds. Delays of the testing framework might mean that the video played for longer, but that’s ok too.

Once again, a lot of the calls to the instrumentation libraries are abstracted out to make the test a little easier to read. This also makes it easier to potentially change out the instrumentation framework in the future.
Due to general lack of any cloud-based solution that would allow us to test on AndroidTvs, we force our application into AndroidTV mode on tablets. We use UIAutomator’s UIDevice to also force them into landscape view, which allows us to run AndroidTv tests on tablets in this way. This is not an ideal solution, but it does do a pretty good job.

Challenges and optimization
When working with these frameworks, we came across several challenges. The biggest one being that more complex application layouts can be very complicated to test. The frameworks have a lot of built-in functionality which works great on very simple elements, but aren’t tailored to work with every special type of list or view widget. We’ve had to spend quite some time figuring out workarounds and using community-developed solutions for these problems.
Another issue is that Espresso has a very convoluted syntax which is hard to read. This is why we abstracted away the majority of this syntax to make it easier to follow what our tests actually do.
Time can also be a sensitive topic when it comes to instrumentation tests. There is a certain balance to be achieved between the test verifying enough, and yet not taking too long to run. One strategy to optimize run times as much as possible is to eliminate static delays and instead try to wait for elements to load or become visible. Developing this in itself can be time intensive with some more complex application designs. Unfortunately, occasionally using static timers becomes unavoidable, especially when dealing with remote control inputs or video streams loading.
One thing that saves a lot of run time is that it is possible to launch activities directly to what the test is verifying. This means that we can cut out a large portion of navigation, which both takes time and can be an additional point of failure. Navigation can then be tested separately in tests dedicated to that goal only, which then makes it clear why a test failed and what the problem is.
There are three areas that we are not testing sufficiently: Video, sound and subtitles. For these areas we have not yet found a comprehensive solution that would allow us to eliminate manual checks.
Conclusion
All in all our instrumentation tests have been a very useful tool in our CI flow. We have a decent suite that covers all of our basic functionality, which has allowed us to catch multiple regressions that could have caused serious usability issues and app crashes. They ensure that our applications do not get released with any major errors or bugs in a way that is very non-intrusive to our workflow. They require technical knowledge and time to set up and maintain, but they also give very quick and precise feedback and ensure that regressions are found and dealt with extremely quickly.
Good Article